Installation
serversideup/php is compatible with any container orchestrator that supports Docker images (Kubernetes, Docker Swarm, Docker Compose, HashiCorp Nomad, etc.). All images are hosted on DockerHub and GitHub Packages for free. Containers default to running Debian, but Alpine images are also available.
Understanding containers and Docker
If you're new to Docker or containers, you might be wondering why you should containerize your application in the first place. The short answer: containers let you run your application anywhere — from your laptop to any cloud provider — with zero changes.
Key benefits of containerization:
- Consistency - Your app runs the same on Mac, Windows, Linux, and production
- Confidence - Infrastructure as code means easier testing and rollbacks
- Freedom - No vendor lock-in; migrate hosts with minimal effort
- Simplicity - Scaling from 1 to 100 containers is straightforward
There are some important terms to understand when working with containers:
| Term | Definition |
|---|---|
| Container | A running instance of an image. |
| Image | A template for a container to start with (like serversideup/php). |
| Tag | A specific version of an image. |
| Registry | A repository of images. This is where users can pull images from to start a container. This can be places like Docker Hub or GitHub Packages. |
| Volume | A way to persist data or share files between your host and container. |
If you'd like to learn more about containers, you can learn more following the guide below.
Learn More About ContainersQuick Start
In order to run containers, we need a container engine installed such as Docker. You can follow Docker's installation guide to get started. Confirm Docker is working by running these commands in your terminal:
# Check Docker version
docker --version

# Check Docker Compose version
docker compose version
If you see version numbers after running the commands, you're ready to go!
Create a new sample project
Let's create a new sample project to test our Docker setup. Open up your terminal and run the following commands:
# Create a project directory with a public directory
mkdir -p my-php-project/public

# Change directory to our project
cd my-php-project
Once we're in our project directory, we will want to create two files:
public/index.php- The file that will be served when someone visits our sitecompose.yml- The place where we will put our configuration files
The content of these files should look like:
<?php
// Let's just print out some PHP info
phpinfo();
?>
Save these files and ensure they are in the exact structure above.
Bringing up your PHP app
From your project root directory, run the following command to start your PHP app:
my-php-project). If you do not have compose.yml in the same directory as you run this command, the command will not work. Also, make sure you don't have any other containers or services that are currently running on port 80. If you do, you will need to stop them before running the following command.docker compose up
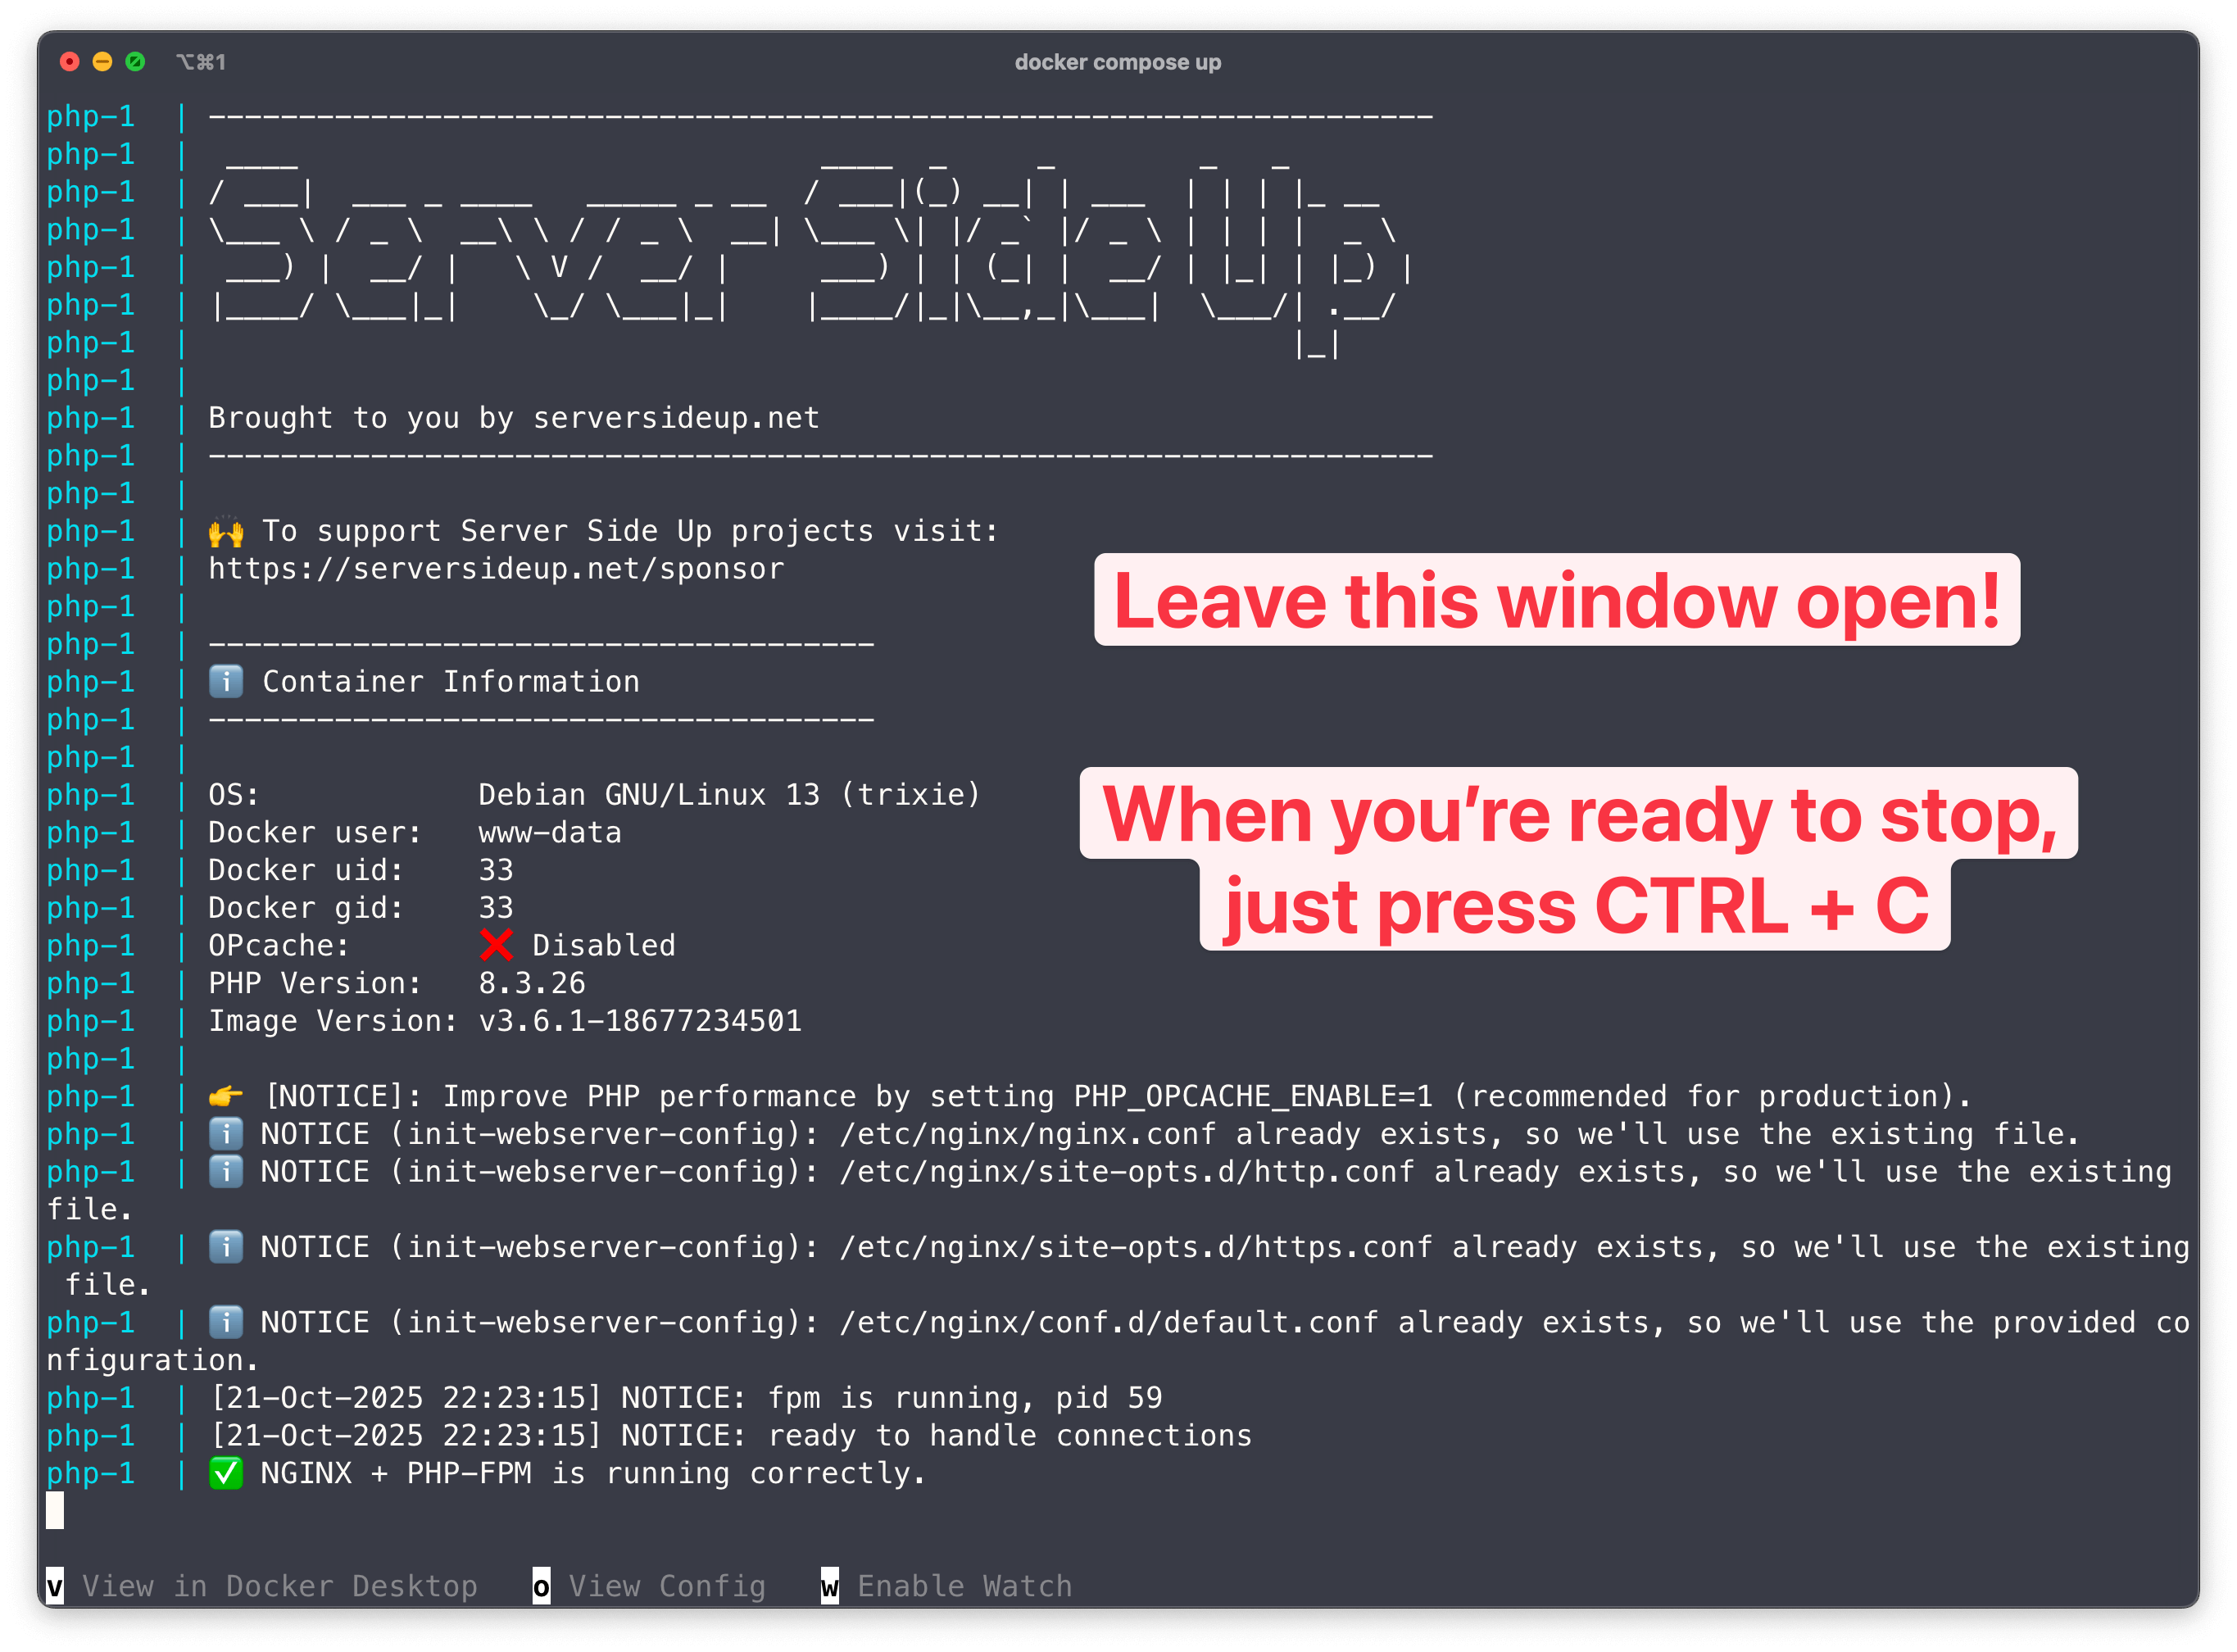
You'll see the logs appear in your terminal. Keep your terminal open as we'll need it to control the container.
Viewing your PHP app
To view your PHP app, open your browser and navigate to http://localhost. You should see the PHP info page showing PHP 8.3 with the fpm-nginx variation:
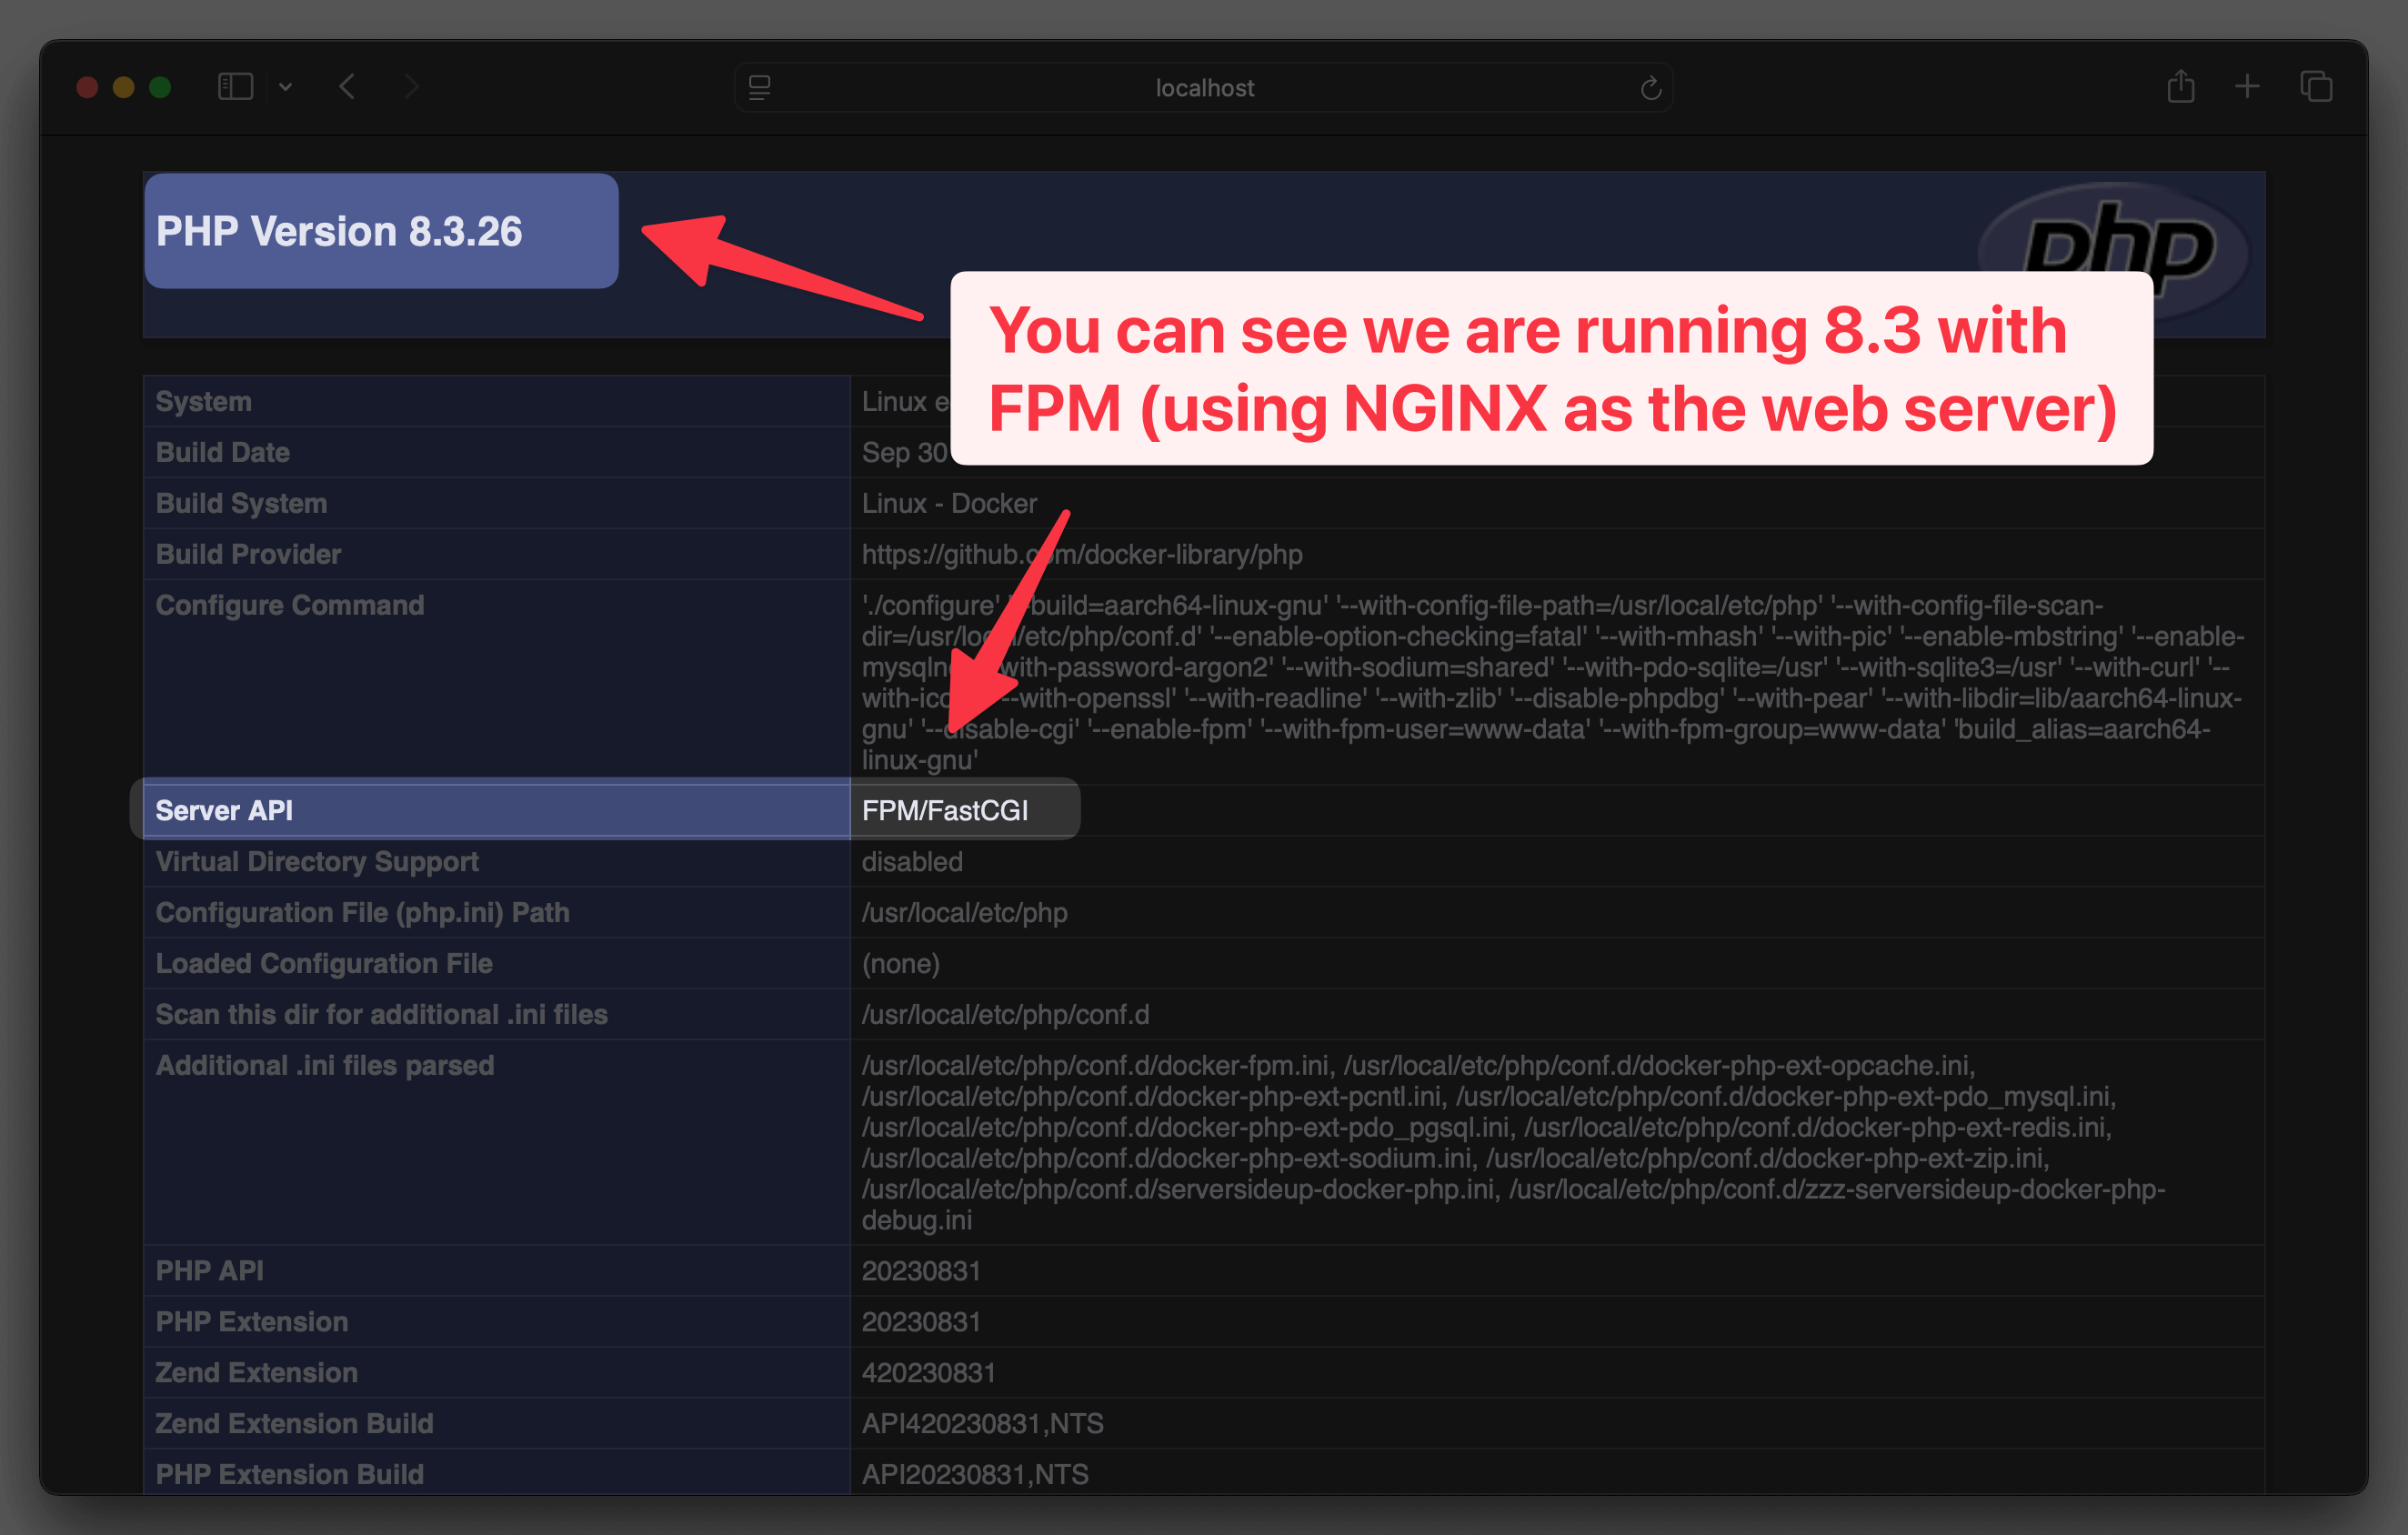
You can see the PHP version is in the upper left corner of the page. But what's also cool is you can see the settings we configured in the compose.yml file are being applied.
Look for these values in the PHP info page:
upload_max_filesize- This should show250Mopcache.enable- This should showOff
To make changes to these settings, we must bring the containers down first before making the changes.
Stopping your application
To stop the container, press + C on the original terminal window or you can run the following command from your project root directory:
docker compose down
Making changes to your PHP app
Let's do something a bit more interesting:
- Let's upgrade to PHP 8.4
- Let's use FrankenPHP instead of FPM-NGINX
- Turn on OPCache
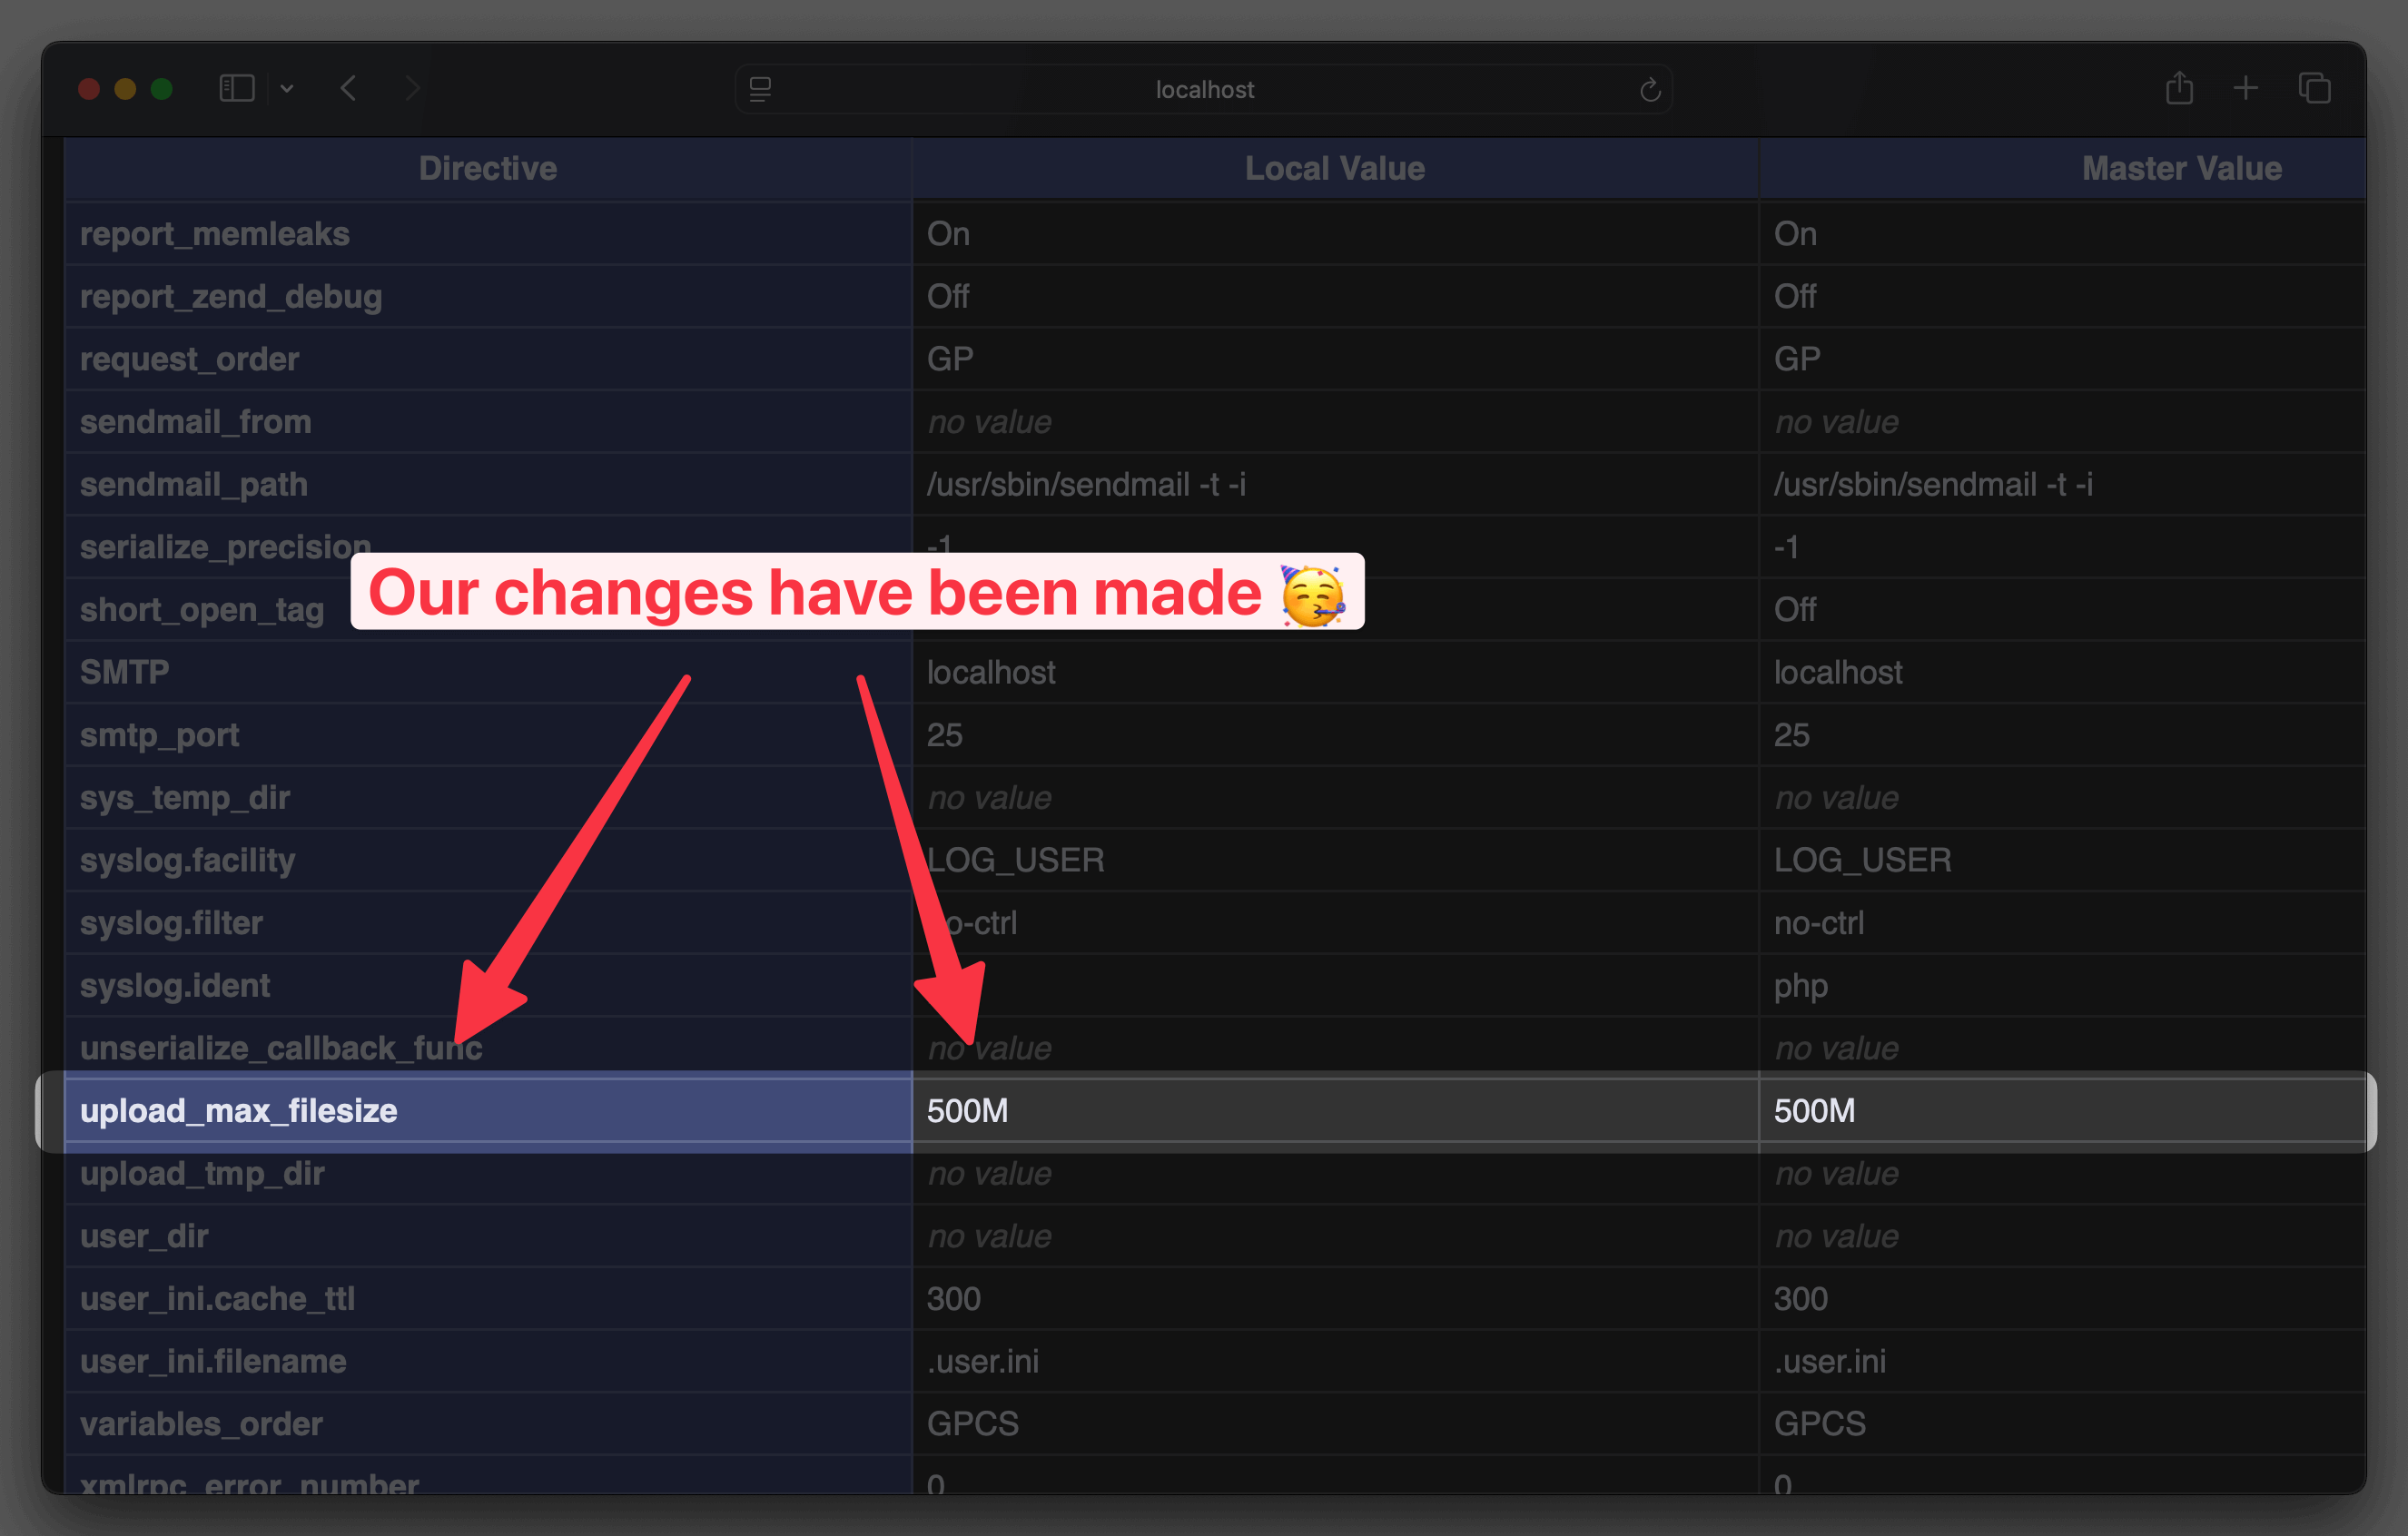
- Increase the upload limit to 500M
services:
  php:
    # Change image to 8.4 with FrankenPHP
    image: serversideup/php:8.4-frankenphp
    ports:
      - 80:8080
    volumes:
      - ./:/var/www/html
    environment:
      # Increase the upload limit to 500M
      PHP_UPLOAD_MAX_FILE_SIZE: "500M"
      # Turn OPCache on
      PHP_OPCACHE_ENABLE: "1"
Now let's bring the containers back up again:
docker compose up
Check http://localhost again and you should see the changes we made:
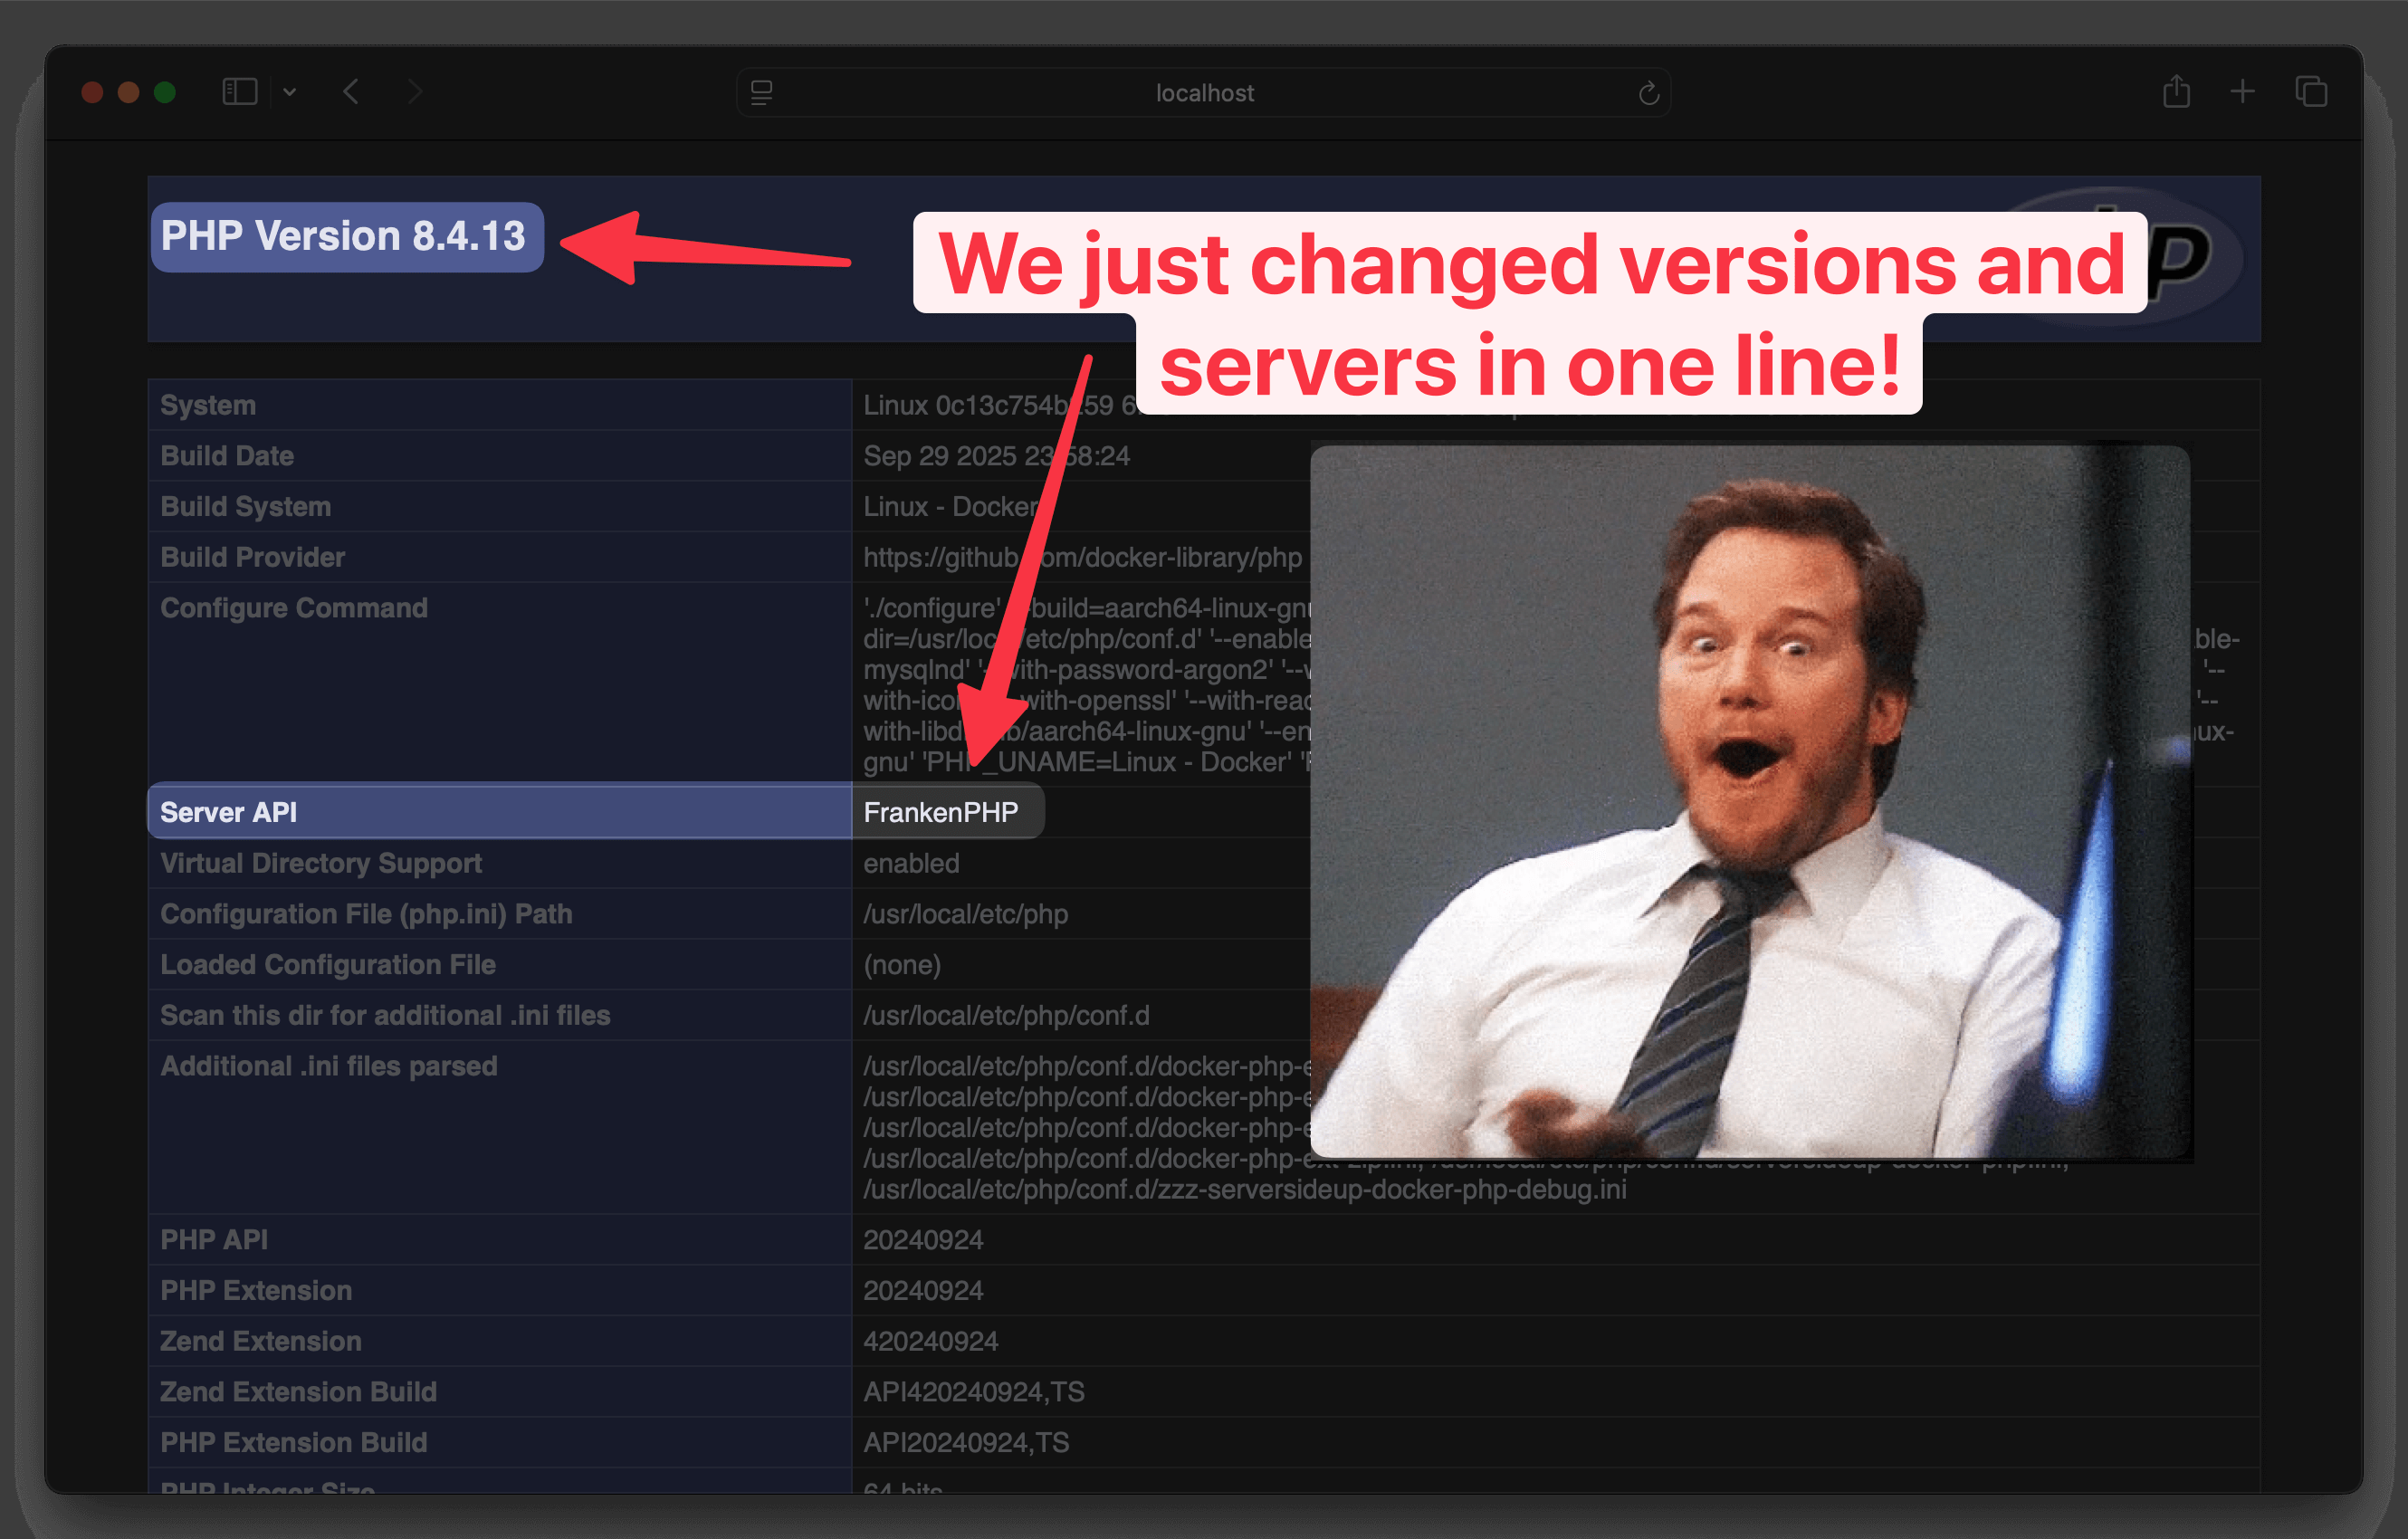
Holy smokes! We've upgraded to PHP 8.4 and you're using FrankenPHP! You can also find the changes to the PHP settings have been applied.
You've got this 💪
You've successfully created your first PHP app with Docker. Better yet, you've seen the power of serversideup/php where it's easy to change your PHP version and variation by changing a single line in your configuration file.
Keep reading to understand how to choose the right image for your project.